1991-96 Caprice/Impala-SS
Center Added Brake/Turn Signal Modification
(C)1998-2008 Marvin Davis
Parts needed;
a. GM RA deep socket or equivalent...... - 2 ea.
Advance Auto's CalTerm #08583 or Conduct-Tite! #85867
PepBoy's Conduct-Tite! #85867
b. 10 Ga. aluminum socket machined disc. - 2 ea.
c. Loctite # 410 Industrial adhesive.... - 1 bot. (0.7 oz)
d. Loctite # 712 Adhesive accelerator... - 1 bot. (1.75 oz)
e. Double-seal rubber socket o-rings.... - 2 ea.
Recommended tools;
a. Adjustable speed Dremel tool with following bit(s);
b. Dremel #194, 1/8" barrel cutting bit.
c. Sanding drum with #408 (60 grit) sanding bands.
d. Rubbing alcohol in spray bottle (or sprayer attached)
e. Green scotchbrite cleaning/soap sponges (Example: 3M Rescue II Soap Pad)
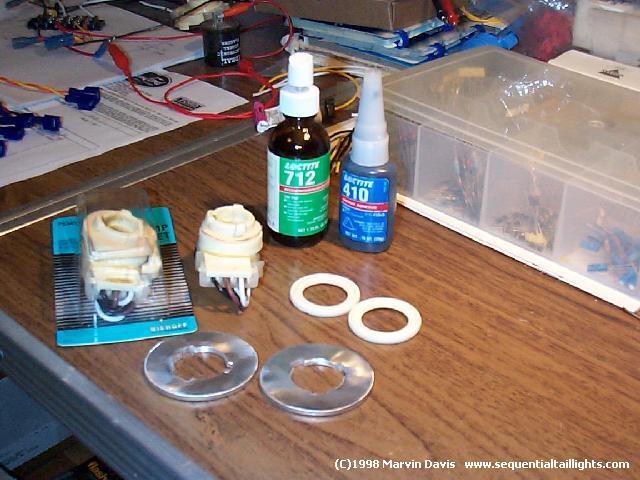
Here is a photo of the parts/supplies I now use in the LBM mod for correct center light focus.
Procedure Steps
There are TWO basic ways to install the socket templates to fix the "focus" problem upon modification of the center parking light to a standard dual filament brake/turn signal light. One is quick and partially successful and one more time consuming and by far the best solution.
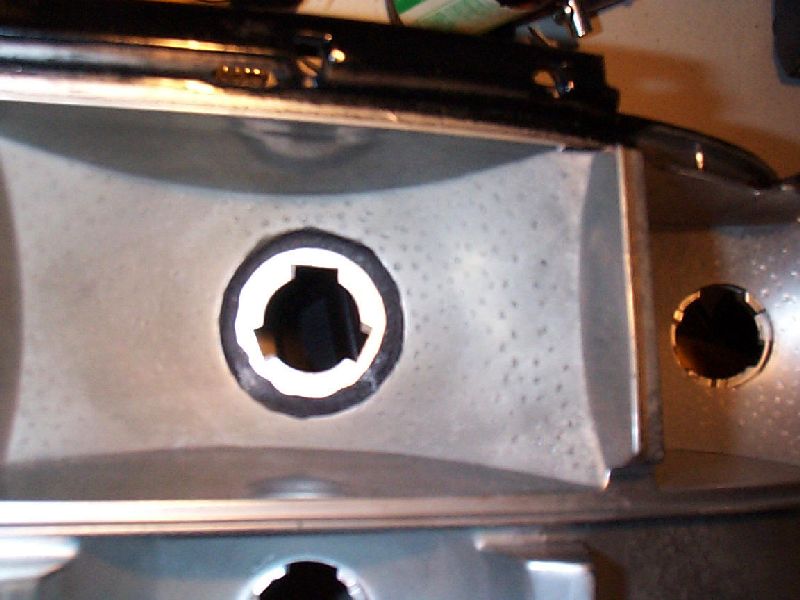
[1.] Drill out the center parking light square/cross style parking light socket to 1-1/8" hole to accommodate 2057 type bulb size.
Mount socket plate on back of bucket by centering and aligning the plate with socket/bulb in place and applying adhesive along back of plate to affix it to the rear of bucket.
[2.] Remove red lens cover and using Dremel tool at MEDIUM speed, completely remove the center "indented" section of the bucket and attach socket adapter plate to back of bucket, while sealing BOTH the back outside and center inside areas.
The later (#2) procedure is best as it will yield the "best" results as you want the indented surface area of the bucket to be removed to allow the best and closest matching reflective properties similar to the other to associated brake/turn signal lamps.
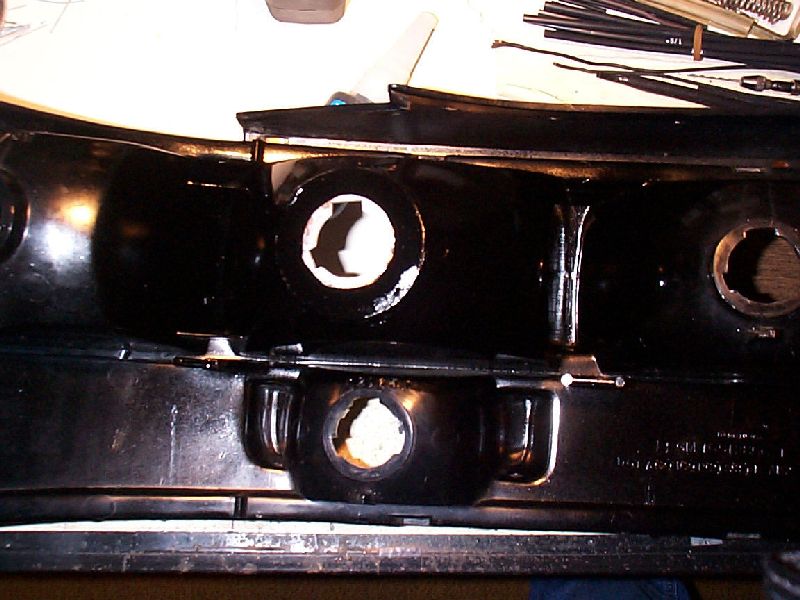
Removing indented center parking light portion;
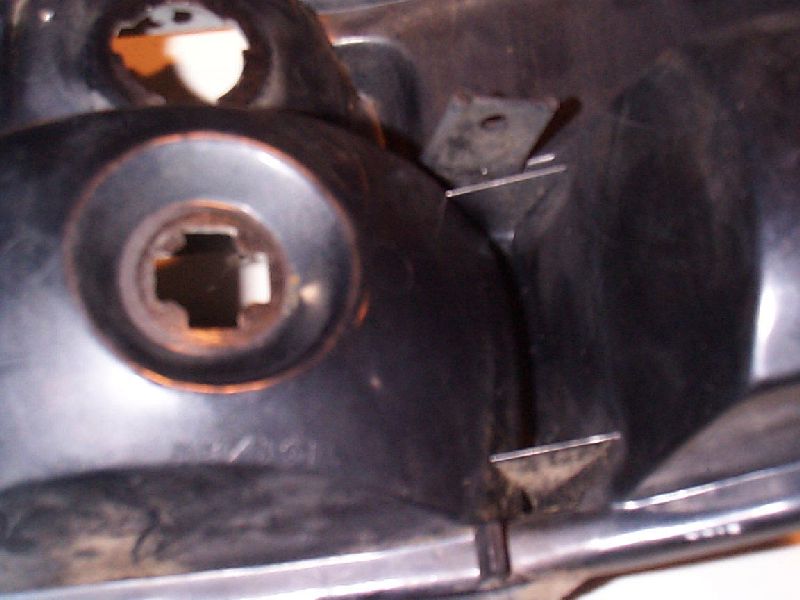
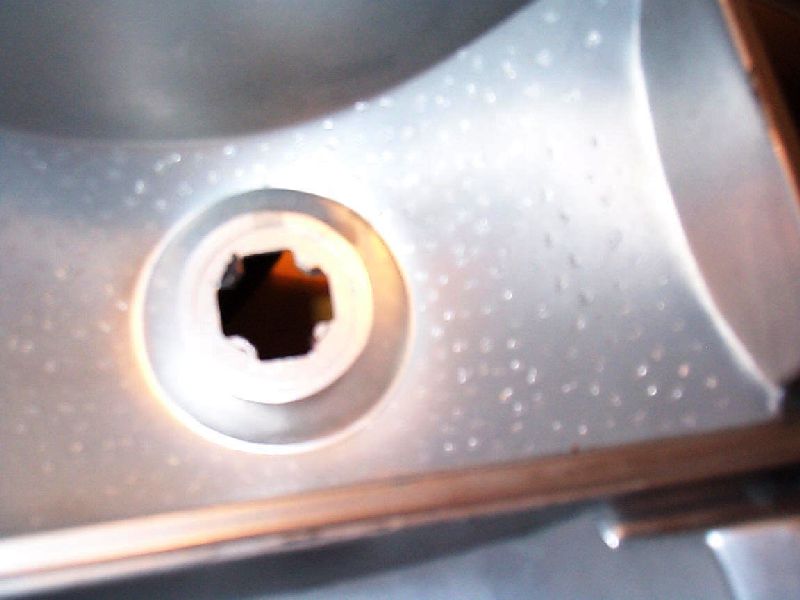
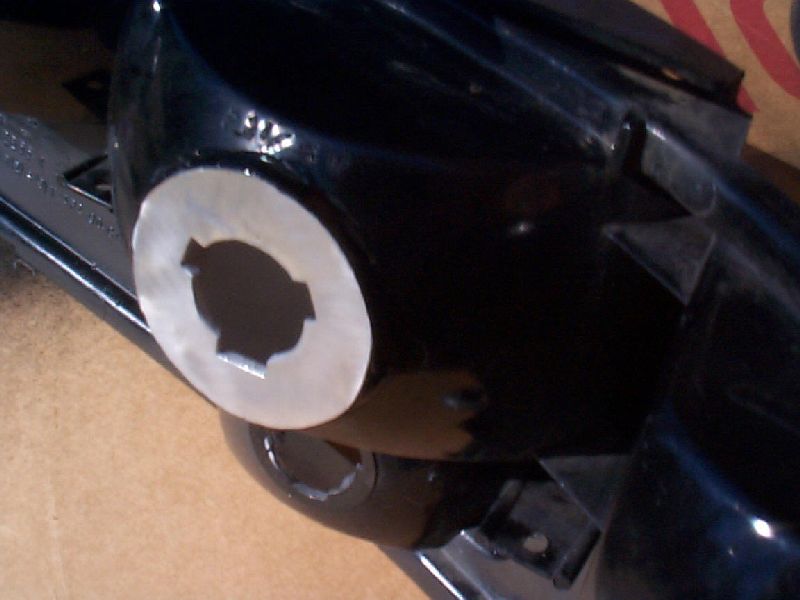
After removing the red lens filter and sticky adhesive, turn the bucket facing up and note that the center bucket area has a distinct line at the "transition" to the raised center section. Use this line as a guide while cutting out the indented portion. Cut to the inside, closest to center leaving the line visible for reference. Note the pictures below of the back and front of the section to be removed.
With the bucket facing up and using the adjustable speed Dremel tool with the 1/8" barrel cutting bit, set the speed to a little faster than "mid-range". High cutting speeds will melt the plastic making it hard to guide and cut smoothly, and to low a speed will create a lot of black plastic powder making it hard to see to cut straight.
I cut from the inside of the cross straight out to the edge BUT just short of the transition line. Leave the line visible as a guide and it will be used later while sanding. I cut along the line at about a "45" degree angle to have most of the edge facing the inside of the bucket. By holding the tool at this angle you will see how to cut easier and we will have more bucket edge to apply adhesive to on the inside for a stronger final assembly.
With a little trial and error, you will find the right speed and cutting pressure to yield a clean smooth cut, and you might want to have a set of ear-plugs handy as hitting some harmonics while cutting may make the bucket ring with a loud annoying high pitched rattle. This is normal and caused by high speed cutting. This also occurs at the correct cutting speed/pressure.
Once I have positioned the bucket while I cut the middle raised section out, I slowly rotate the bucket to keep true to the transition line. Take your time and keep steady EVEN pressure and if you attempt to go to fast you'll melt the plastic! You will be forced to stop and clean out the cutting track to be able to proceed!
Once complete, you should have a nice round circle cut out with about 1/8" of the black plastic housing edge showing and a sharp clean edge on the back of the bucket.
Take the Dremel toll and using a medium grade sanding barrel *lightly* sand the inside to very edge of the transition line to get a smooth surface around the inside. Clean up all sanding dust and I use rubbing alcohol in a spray bottle to wipe it down.
Take the 410 adhesive and give the bottle a few good shakes and the alum. socket template and note that one side will have the words BACK on it. Place the plate over the rear hole while looking side and note the LARGE key cutout position. Center the socket hole in the middle of the bucket and set the large key to the exact same position as the other two sockets on either side.
TAPE the back of the socket plate to the bucket with electrical or duct tape so that it stays in the correct position or orientation and apply a bead of 410 adhesive about the inside of the bucket on the black edge to the plate. You only need about 1/4" bead here and as soon as you complete the circle, spray the adhesive with the accelerator to cover the adhesive, using more will only waste the 712. Being held in position by the tape on the back, let the center cure for about 15-20 min's. You will note that the accelerator will cause the adhesive to turn white, but this is easily cleaned off with rubbing alcohol sprayed on it and an old tooth brush to loosen it to be wiped off with a clean dry cotton rag/cloth.
Once the inside has been done and dried, you slowly remove the tape off the back while holding the socket plate. Now you can run a bead of adhesive about the outside of the socket plate and the area at the edge to fill the GAP to the bucket. The plates are slightly oversized to allow the adhesive to be used to fill up this area and provide more surface for adhesion.
Lightly spray it will accelerator while holding the bucket with the rear area facing down so adhesive and accelerator will run back to the socket plate. Let this dry for about 15-20 min's and you can clean it will alcohol to remove the white powder.
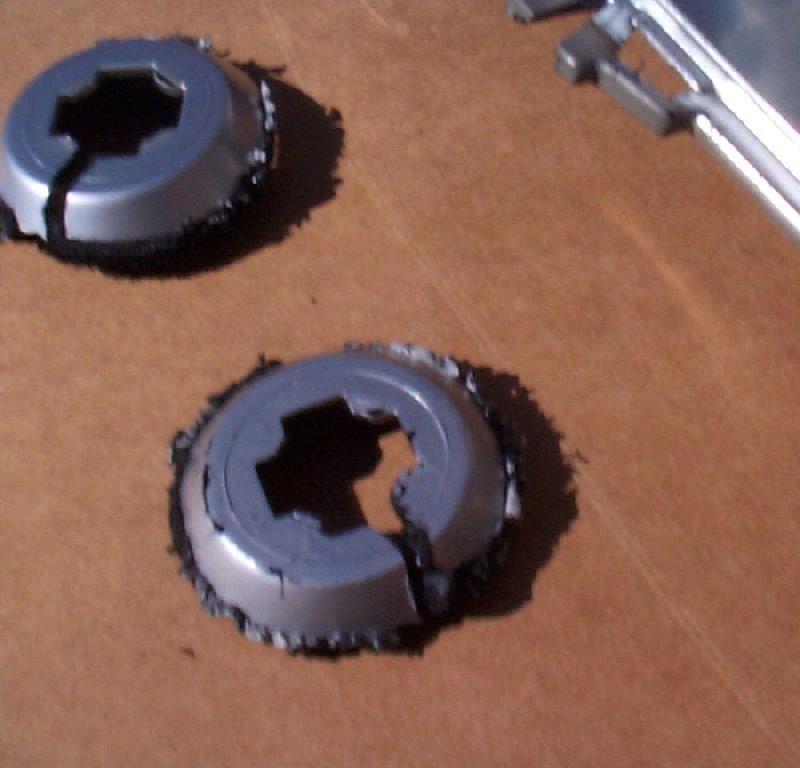
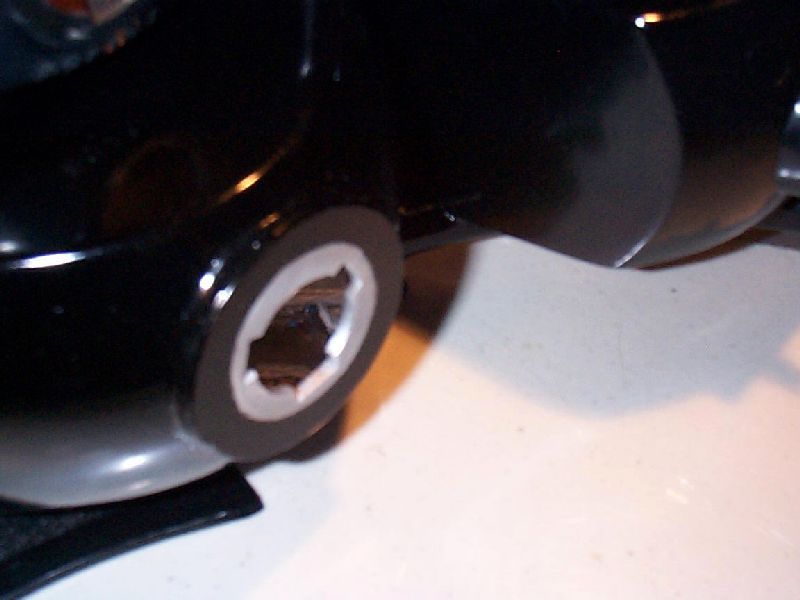
Once you have done the basic mounting, you now go back with one or two more light layers of 410 to "build up" adhesive to complete the final assembly. I do not use accelerator here as I want a nice "smooth" clean finish and I set the bucket aside to dry overnight for final strength. When done, you will have a very strong assembly and it will look much like the other two buckets. Note the pictures below of the adhesive rear finished assembly.

If you do not plan on installing reflective film(s), you will need to cover the inside area of the bucket in reflective type alum. spray paint to cover the black adhesive. Once 2 or three "light coats" are sprayed over the inside, it will look and reflect light like the other two associated bulb reflector(s) sections.
To complete the socket installation, I proceed mask off and paint the rear reflector housing and use a good quality gloss black spray paint to cover the adhesive and exposed aluminum of the socket plate. Note the following pictures.
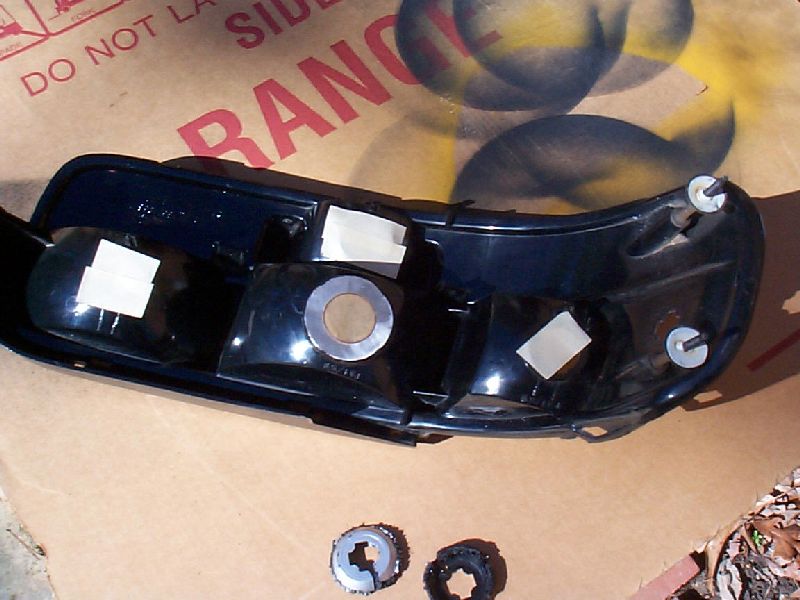
Exposed areas masked off prior to painting.
Bucket now ready for next stage of modification
Tail Light Sockets
The sockets included in the sold kit are different than the ones now in use on the B-Body Impala/Caprice. These are not "low profile" like on the car but are deep back or recessed so the bulb sits deeper (5/16") in it. Since there is no key/lock for the socket on the center bucket, you will need to position the socket back in the same exact position as the other two brake sockets for correct filament position. This is the purpose of the lock, to set the correct filament position.Note the same replacement GM type socket is available under two different part numbers at two major auto-parts stores.
These are listed at the top of this document.
Factory sockets have a soft foam type gasket/seal, and I now include newer double-seal rubber gaskets which when installed fit to the socket plate very "tight". These newer type will outlast those GM foam gaskets are now beginning to deteriorate and physically rot (depending on your area climate)! This will assist you to rotate and hold the socket to the correct position, as it will not vibrate or move out on its own. When installed, you will have to press down firmly while rotating the socket to it's correct position. Look closely at the other two brake socket backs when installing the bucket and set the center one to the "exact" same position. This again is very important here to have the bulb filaments vertical in the reflector housing.
When completed, the combination of the socket plate and new deep type socket will now match the focus characteristics of the other two brake/turn signal lights making them all match in pattern and brightness. Dreaded Dim bulb effect is now eliminated!
Feel free to contact me if you have any questions or concerns on doing the center brake light mod/fix.
All written material, pictures and technical information (C)1997-2008 Marvin Davis
All rights strickly reserved, use or reprint prohibited without expressed permission
Questions or comments can be directed to me via email webmaster@sequentialtaillights.com